Hug-A-Pet Sea Creature Summer Drinks
This is a sponsored post written by me on behalf of Jazwares and Hug-A-Pet. All images and opinions are 100% my own.
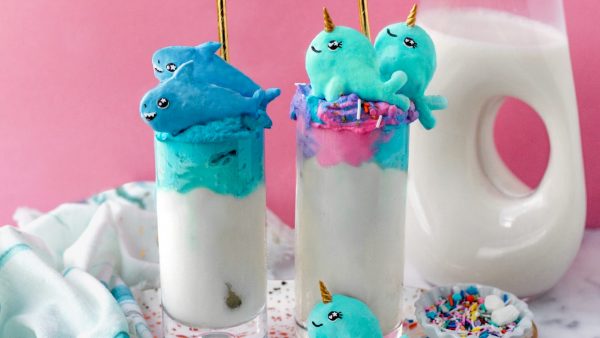
I live in Ohio, and summers here get so hot, humid, and sticky that it can feel like being in a jungle haha. Between June and August I basically live on frozen and chilled treats to keep my cool (in more ways than one 🙂 )! To kick off summer, I created these refreshing sea creature drinks in collaboration with my friends at Hug-A-Pet. They’re inspired by Hug-A-Pet’s crazy cuddly stuffed animals, as well as the Dalgona coffee trend, and they’re sure to make a splash with kids of all ages (including me)!
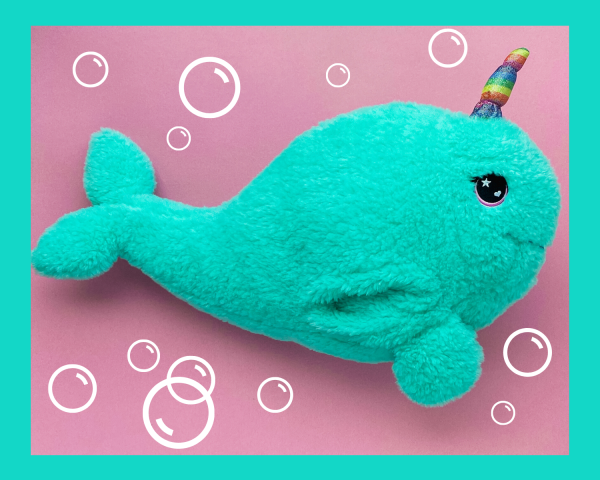
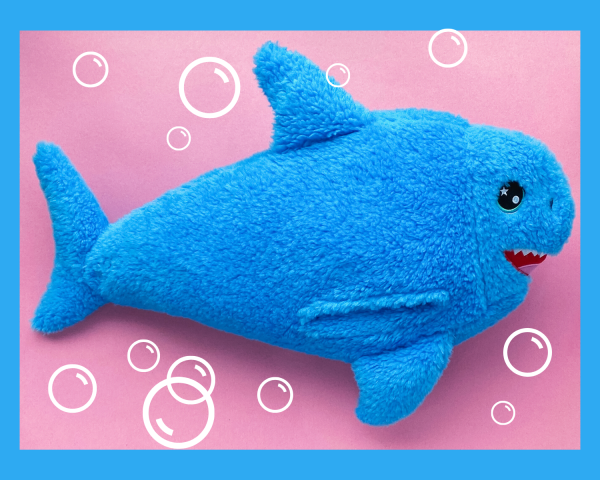
With everything that’s been going on the in the world lately, I can’t think of a better time for a hug! The Hug-A-Pets are designed with special pockets so you can actually wrap your arms through them and give them a squeeze. It’s quite comforting, I think, and as soon as I saw them I couldn’t help but think they’d be perfect as marshmallows (which I also love to squeeze). If you’ve never tried homemade marshmallows before they can feel a bit intimidating, but I’ve included a PDF template to make the sea creatures a breeze, and for even more tips and tricks check out my IG stories to see the process in action.
Unlike Dalgona, this whipped drink is caffeine free – topped with a vanilla pudding whipped cream instead of coffee, and of course those fluffy cotton candy marshmallows! You can easily customize this treat to make it allergy friendly with the substitutions below, and feel free to swap out the colors for your favorites (or use natural fruit powders).
The full collection of Hug-A-Pets can be found online at Amazon, and in Walmart stores (you can see my adorable Hug-A-Pet inspiration below).
Ingredients: (makes 2 drinks with leftover marshmallows)
Cotton Candy Marshmallows:
1 envelope unflavored gelatin (substitute agar agar for vegan)
1/3 cup cold water
1 cup sugar
1 tablespoon light corn syrup
¼ cup cold water
Pinch of salt
½ teaspoon cotton candy extract (or 1 teaspoon vanilla extract)
Candy thermometer
4 piping bags
2, 1A large round piping tip for body shapes
#10 round piping tip for narwhal fins and tail
#3 or #4 small round piping tip for shark fins and tail
¼ cup dark or milk chocolate chips or melting wafers
¼ cup white chocolate chips or melting wafers
Pink decorating icing or melted pink chocolate
Coating powder (3 Tablespoons cornstarch mixed with ¼ cup powdered sugar)
Teal or turquoise and royal blue icing gel colors
Unicorn horn sprinkles
Vanilla Whipped Topping:
½ cup heavy whipping cream (or coconut cream to make it dairy free)
1 tablespoon vanilla pudding mix
1 tablespoon powdered sugar
½ teaspoon vanilla extract
Pink, blue, and purple icing gel colors
Iced Latte:
2 cups of your choice of milk (I used almond milk)
4 ice cubes
Rainbow sprinkles
Sprinkle stars
2 reusable or recyclable straws
Helpful Tips:
If using coconut cream, it should be chilled, upside down, in the refrigerator the night before whipping to separate any liquid from the cream. It’s also easiest to make the marshmallows the night before putting together the drinks so that they have time to set before handling them.
I find that baker’s sugar works best for the marshmallows as the finer granules melt quickly and evenly.
*Warm water makes marshmallow very pliable, so you can easily smooth out any mistakes or mold the shapes, once piped.
Directions:
- Let’s begin with those fluffy, puffy marshmallows! I like to make the face details first, with melted chocolate, so that they have time to set while the marshmallows come together. Place the white, pink, and milk or dark chocolate into 3 separate heatproof bowls. Microwave each in 30-second intervals, at 50% power, stirring after each interval. Continue until the chocolate is smooth and completely melted.
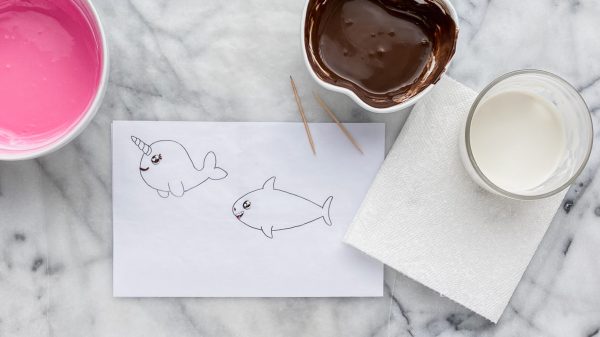
- Print off the PDF template and place it under a sheet of wax paper. Use a toothpick dipped into each color of melted chocolate to draw the details for each animal. (I have a video in my IG stories to show a few tips and tricks for this process). Let set.
- Pour 1/3 cup cold water in the bowl of an electric mixer, and stir in the gelatin. Allow the gelatin to soften while you make the syrup.
- In a small saucepan, combine the sugar, ¼ cup water, light corn syrup, and salt. Stir, and cook over medium heat until the sugar dissolves.
- Turn the heat up to high, and continue to cook (without stirring) until the syrup reaches 240° F on a candy thermometer.
- With the mixer on low, slowly (and carefully) pour the syrup into the softened gelatin. Gradually increase the speed to high, and whip until soft peaks form and hold their shape, about 8-10 minutes. Add the cotton candy or vanilla extract, and whip just until it is incorporated.
- Divide the marshmallow fluff between 2 bowls. Fold teal coloring into 1 bowl, and the royal blue into the other.
- Transfer the teal marshmallow to 2 piping bags fitted with the 1A and #10 piping tips. Transfer the royal blue to the 2 piping bags fitted with the 1A and #3 or #4 tips.
- Line a baking sheet with wax paper and dust with the coating powder (this prevents the marshmallow from sticking). You can place the template underneath the wax paper, as a guide.
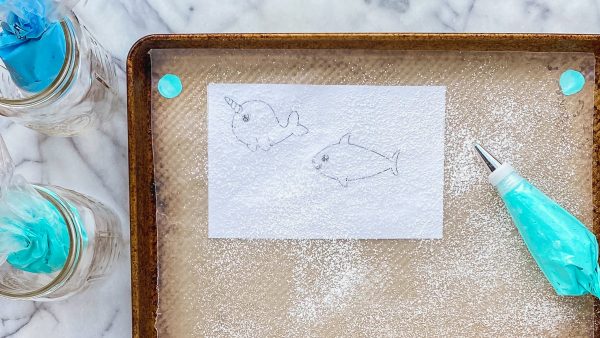
- Using the bag with the 1A tip, pipe a large circle for the narwhal’s body. Use the other piping bag fitted with the #10 round tip to add the fins and tails. (You can also see how I piped them in my IG stories). If you are left with any lumps or peaks on the marshmallow you can lightly wet a clean finger, with warm water, and smooth out the marshmallow. You want to work quickly before the marshmallow begins to set, so only pipe 2 at a time, and then move to the next 2.
- Using the royal blue marshmallow, follow the shape of the shark with the smaller, round piping tip, then use the 1A to fill in on top. Smooth out any bumps.
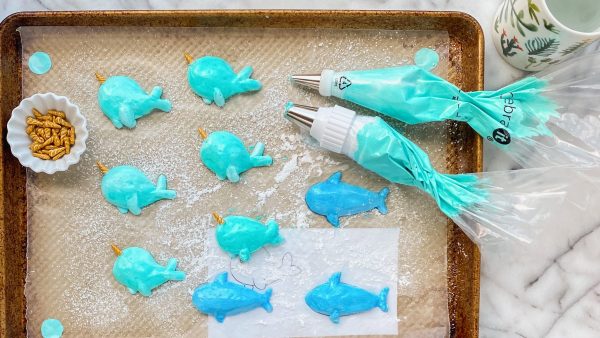
- While the marshmallow is still sticky you can place a unicorn horn on top of each narwhal.
- Once the chocolate details are set you can use a toothpick to help carefully transfer them onto each marshmallow.
- Allow the marshmallows to dry for at least 4 hours before carefully removing from the wax paper. You can use more of the coating powder on any spots that are sticky.
- Next we will prepare the whipped topping! Chill a mixing bowl and the whisk attachment in the freezer for 10-15 minutes. Pour the heavy cream and vanilla into the prepared mixing bowl (or if using coconut cream scoop just the solid part into your bowl), and mix on medium for 3-4 minutes until it starts tp thicken up, and soft peaks begin to form. Add the powdered sugar, vanilla extract, vanilla pudding mix, and whip again until it’s just starting to form stiff peaks.
- Transfer the whipped cream to 3 small bowls and fold pink, blue, and purple icing gel coloring into each bowl (you will want more blue than the other colors to use for the shark as well). *I like to hand whisk a splash more of cream in while adding the colors to make the topping smooth and spoonable.
- Add 2 ice cubes to each glass and pour over your milk of choice.
- Spoon part of the blue whipped topping on top of each glass, and then add the pink and purple to the glass for the narwhal. Use a spoon to slightly swirl the colors together.
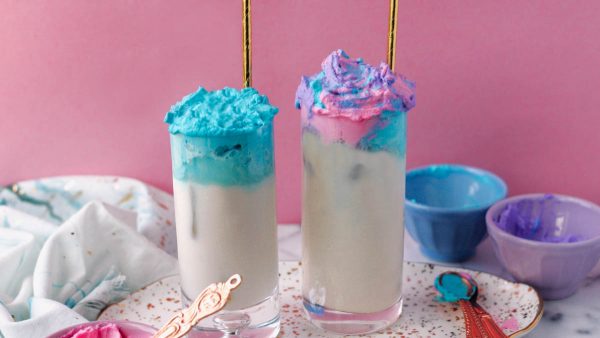
- Add a straw and decorate with sprinkles. Place your marshmallow sea creatures on top, and enjoy!
Leftover marshmallows should be stored in an airtight container. They are best eaten fresh when they are softest, but if you prefer a meringue cookie-like texture you can let them sit out until they crisp up. Please let me know if you try this recipe, I would love to sea your creations (pun intended)!
Leave a Reply
join the mailing list!
get recipes and other delicious tidbits sent to your inbox!
Soooo cute !!!
Thank you so much Diane 🙂