


Strawberry Caticorn Ice Cream Cake
*This post was created in collaboration with ILoveIceCreamCakes. All words, images, and opinions are my own.
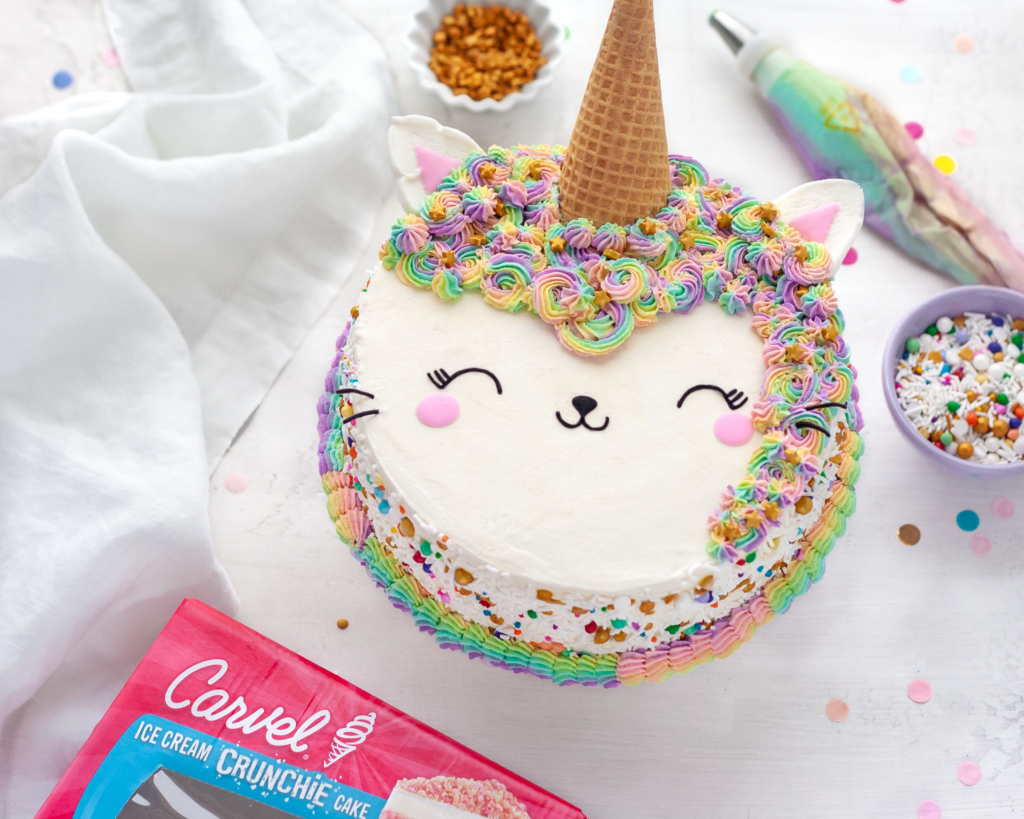
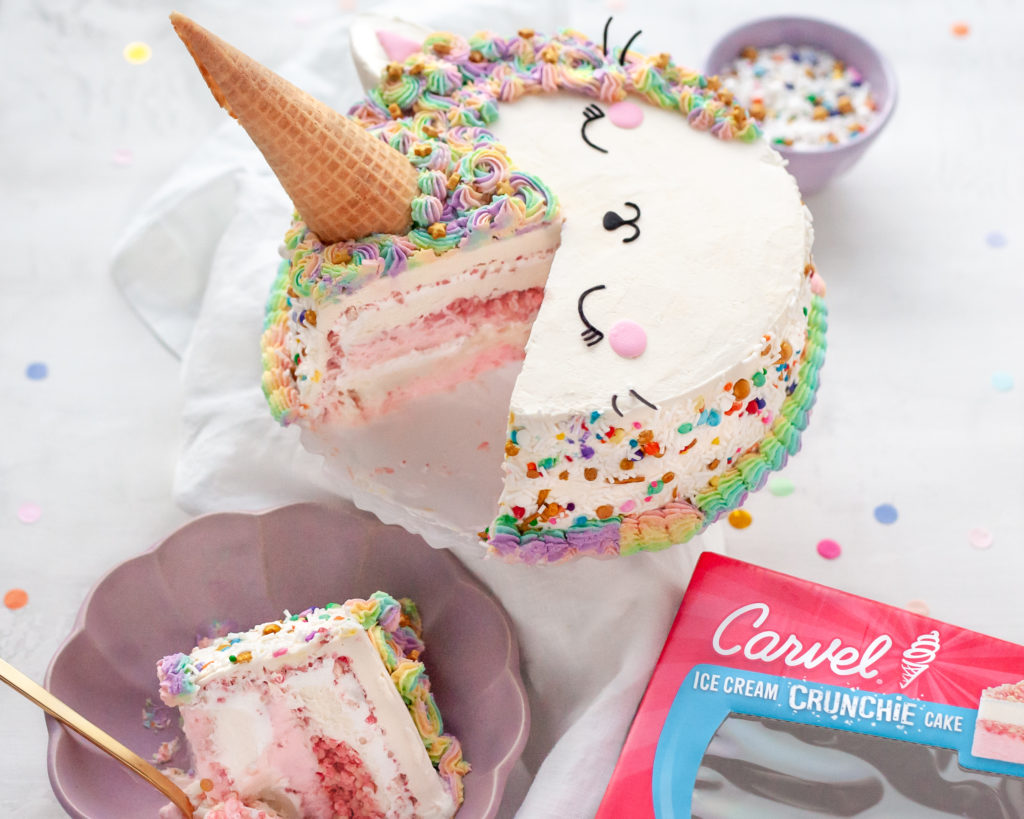
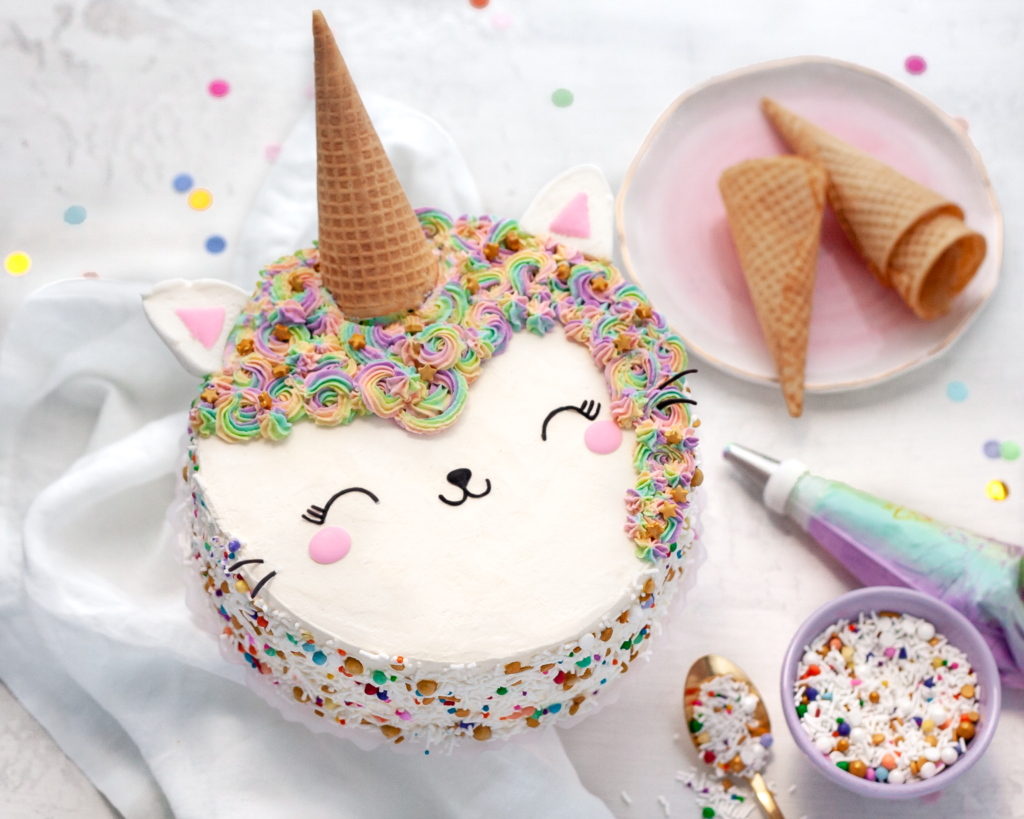
Ice Cream is not only my favorite sweet, it’s also the purrrfect summer treat! In celebration of National Ice Cream Month, I’ve partnered with my friends at I Love Ice Cream Cakes to create a meowgical dessert that’s as delicious as it is adorable, and a literal piece of cake to assemble (no oven required). This cute caticorn is made using 2 Carvel Lil’ Love Strawberry Ice Cream Crunchie Cakes, marshmallow whipped frosting, lots of sprinkles, marshmallows, and of course, an ice cream cone horn to complete the look. It would be pawsitively precious for a birthday party or summer sleepover as well. You can find this cake and all the I Love Ice Cream Cakes in the bakery section of your favorite grocery or visit ILoveIceCreamCakes.com, and checkout the tutorial below to create your own.
Ingredients:
2 Carvel Lil’ Love Strawberry Ice Cream Crunchie Cakes
Marshmallow whipped frosting
Rainbow sprinkles
Gold/star sprinkles
Pink, orange, yellow, green, blue, and violet icing gel coloring
2 jumbo marshmallows
4 toothpicks
Dark chocolate and pink melting wafers
Small cake stand or cake plate
Piping bags (fitted with regular coupler, if using)
Small open star tip (I used #32)
Marshmallow Whipped Frosting:
2 cups heavy whipping cream, chilled
2 teaspoons pure vanilla extract
½ cup marshmallow fluff or crème
½ cup powdered sugar
Helpful Tips:
It’s best to assemble and decorate the cake the day before you enjoy it to give plenty of time for everything to properly chill. The freezer is your best friend in this tutorial :). I like to work in small increments (about 10 minutes or less at a time before returning the cake to the freezer for about 30 min to keep it frozen).
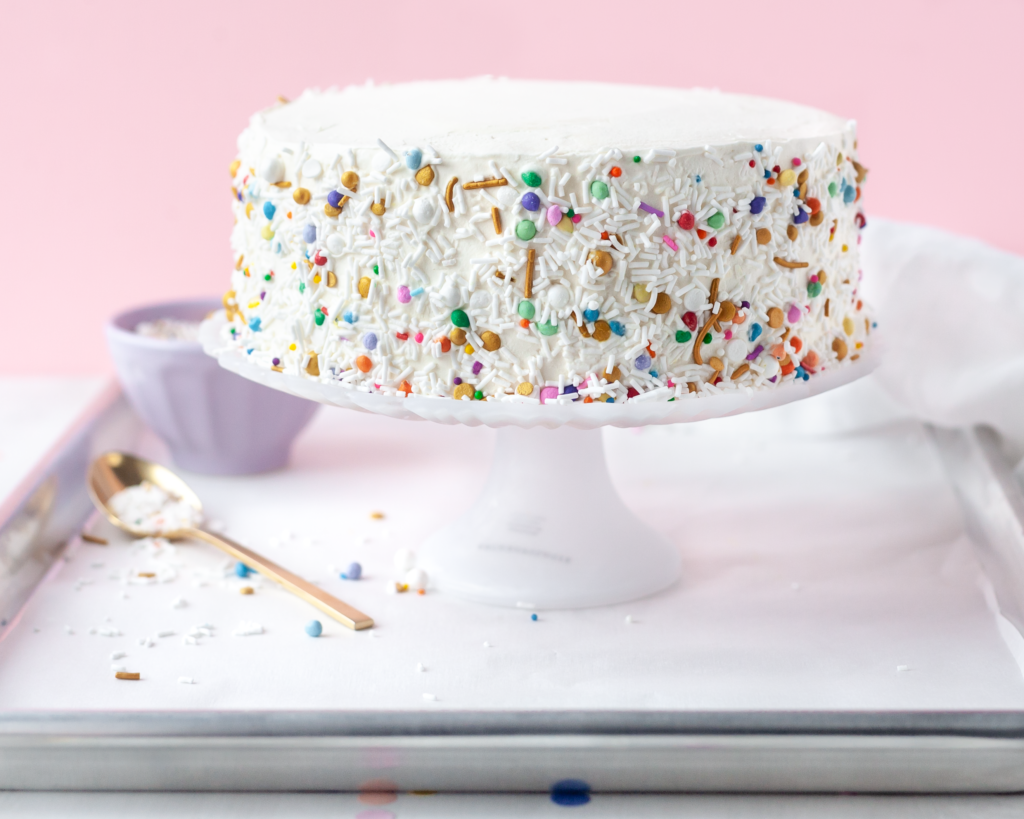
Depending on your personal preference, you can choose to decorate either the side or the top of the cake (like I did). If decorating the side, you can add the sprinkles to the top instead. Customize it however you’d like, that’s part of the fun with cake decorating!
There are several methods for creating the rainbow whipped frosting. Instead of using all the piping bags, you can use an offset spatula to spread each color onto the plastic wrap or you can skip all these steps and add a smear of each icing gel directly to your piping bag instead. Then when you fill the bag up with the whipped frosting and pipe, the colors will be transferred to the frosting swirls.
Directions:
- Transfer one of the Carvel Lil’ Love Strawberry Ice Cream Crunchie Cakes to your cake stand or plate then top with the second cake. Freeze for 30 minutes.
- While the cake sets let’s make the frosting! Transfer the mixing bowl from a stand mixer and the whisk attachment to the freezer for 15 minutes. Once properly chilled, add all the frosting ingredients and whip, starting on low speed and slowly working your way up to high speed. Continue to beat for 3-5 minutes or JUST until stiff peaks begin to form. You don’t want to overwhip or the cream will begin to curdle.
- Remove a heaping cup of the whipped frosting and divide it evenly among 6 small bowls (about 3 TB each). Color each as vivid or pastel as you’d like folding in the icing gels (I like to add a drop or 2 of the pink coloring to the violet). Prepare a piping bag with a coupler (if using). Lay out a piece of plastic wrap lengthwise and pipe or spread each color side by side. Carefully bring the 2 short sides of the plastic wrap together and twist the ends closed. Cut one end open and drop it into the prepared piping bag. Transfer to the refrigerator until ready to use.
- Use an offset spatula and bench scraper to frost the entire chilled cake with the uncolored marshmallow frosting. To create a smooth canvas, I added 2 layers of the frosting freezing after each (the first helps to lock in the strawberry crunchies). Return to the freezer for 45 minutes.
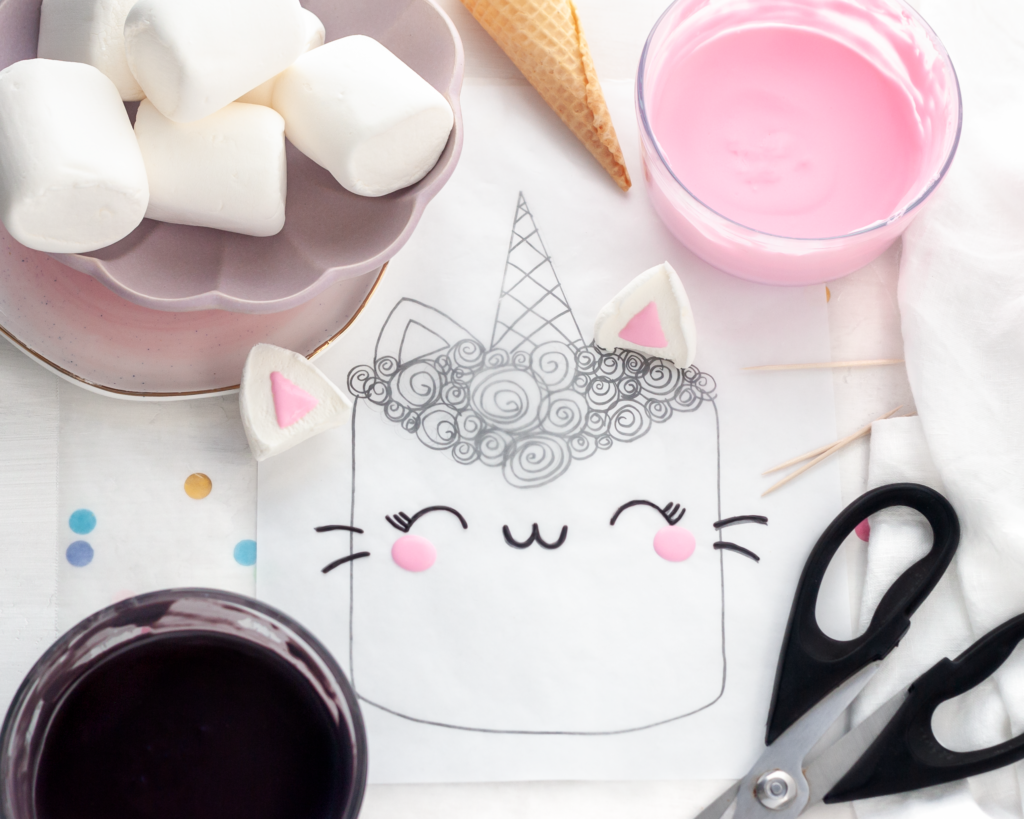
- Print the caticorn template out (sized for decorating the top or side of the cake), and cover with a sheet of wax paper.
- Transfer the dark chocolate and pink melting wafers to microwave-safe bowls and melt in 30-second intervals at 50% power, stirring after each, until smooth and completely melted. Use a toothpick dipped into the melted wafers to “draw” the eyes, mouth/nose, whiskers, and cheeks onto the wax paper. Allow to set.
- Cut each jumbo marshmallow in half horizontally to make the ears. Dip the kitchen scissors into powdered sugar to prevent them from sticking. Use more of the pink melted wafers to add a pink triangle to the inside of each ear and allow them to set. Once dry, you can coat the marshmallows in a little more powdered sugar (so they aren’t sticky).
- Remove the chilled, frosted cake and use a clean hand or a small spoon to cover the sides or top of the cake in rainbow sprinkles. Freeze again for 30 minutes.
- Prep all your caticorn accessories by adding 2 toothpicks to each ear and gently unpeeling the face details from the wax paper. Carefully add the nose/mouth, eyes and cheeks to your cake. Attach the open star piping tip to your rainbow frosting piping bag and pip tons of swirls, large and small, all over for the mane (creating a “V” just above the caticorn’s nose/mouth). Add the star sprinkles to the mane and the ice cream cone horn to the center. Insert the ears on each side of the horn and the whiskers on either side of the cheeks. Return your completed cake to the freezer for 45 minutes or until ready to serve.
- To create crisp slices, run a long-serrated knife under warm water and wipe before making each cut on the cake. Serve immediately. Tightly wrap any leftovers and store in your freezer.


join the mailing list!
get recipes and other delicious tidbits sent to your inbox!


