Cabbage Patch Kids Cuties Cupcakes

*This is a sponsored post written by me on behalf of Jazwares. All opinions and images are 100% mine.
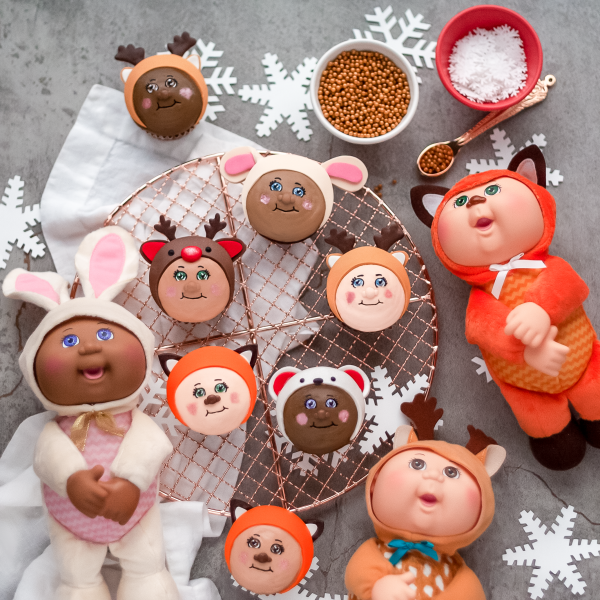
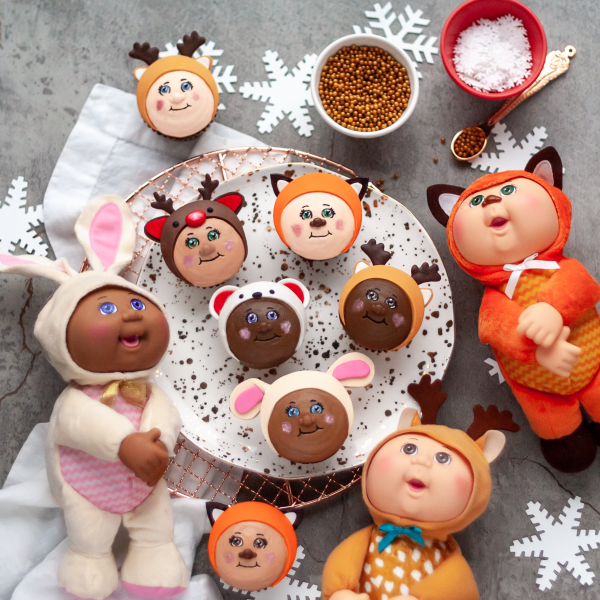
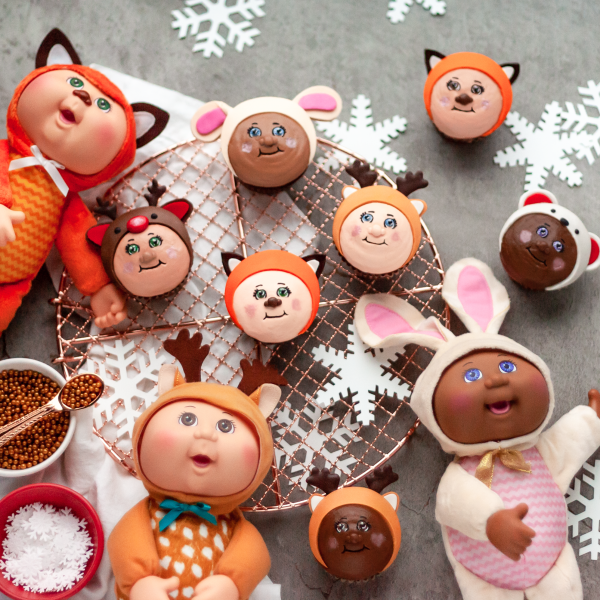
I love finding inspiration from a variety of places, and often it’s a favorite memory or character from my childhood that sparks a food creation. So I was super excited when Cabbage Patch Kids reached out to collaborate on a fun and festive sweet for the holidays! When I was little, I had a Cabbage Patch Kids doll that I carried with me everywhere, and when the CPK package arrived and I smelled that familiar baby powder scent it brought back all of those wonderful memories. These Cuties are smaller than the full size doll I grew up with. At just 9″ each they are extra adorable and super snuggly in their animal onesies. I decided to create cupcakes to match the Woodland Friends Collection (and also snuck in a few of the Holiday Helpers since Christmas is right around the corner 🙂 ).
These cream cheese frosting topped gingerbread cupcakes are much less intimidating than they look with the help of cookie cutters to recreate those sweet animal hoods (and a template I’ve included for the faces). Feel free to customize them however you’d like with different skin tones and animal features. One of the things I love about Cabbage Patch Kids is how inclusive and diverse they are – you can find many of the same characters in a variety of complexions. There are also new Cabbage Patch Kids Cuties released all the time, with tons of animal and even holiday versions to choose from. You can find and adopt a Cuties friend at Target. So grab your fave Cabbage Patch Kid, and a parent helper, and get ready to bake!

Ingredients: (makes 1 dozen cupcakes)
Gingerbread Cupcakes:
1 1/3 cups all purpose flour
3/4 teaspoon baking soda
1 teaspoon cinnamon
1 teaspoon ginger
1/4 teaspoon nutmeg
1/8 teaspoon cloves
1/2 teaspoon salt
1/2 cup unsalted butter
1/2 cup packed brown sugar
1/2 cup molasses
1 large egg
1/2 cup whole milk
Cream Cheese Frosting:
1 cup unsalted butter, softened
2 8oz. bricks of cream cheese, softened
1 tablespoon vanilla
1/4 teaspoon salt
7 cups powdered sugar
Cabbage Patch Kids Cuties Decorations:
Woodland Friends Cuties Template
White fondant
Chocolate fondant
Cocoa, blue, green, violet and white candy melts (any brand will work as long as they are microwave safe)
Orange, ivory, peach, pink, and brown icing gel colors
Pink color dust or a pink edible food marker (for the cheeks)
Large round piping tip
Piping bag fitted with a large coupler
Triangle cookie cutters
Nesting circle cookie cutter set

Helpful Tips:
*An adult should assist with all cutting and baking (especially removing the hot cupcakes from the oven).
Cut out all of the fondant pieces ahead of time so that once the cupcakes are cooled and frosted you are ready to decorate!
Directions:
- Preheat your oven to 350°F. Line a muffin pan with cupcake liners. Set aside.
- In a medium size mixing bowl, whisk together the flour, baking soda, cinnamon, ginger, nutmeg, clove, and salt. Set aside.
- Using a stand or handheld mixer cream the butter and sugar on medium high speed for about 3-5 minutes until light and fluffy. Beat in the molasses, egg, and milk until combined. Scrape down the bottom and sides of the bowl.
- Slowly add the dry ingredients into the wet, with the mixer running on low. Mix until just combined (it’s ok for the batter to be a little lumpy).
- Fill each cupcake liner 2/3 full (about 3 TB batter), and bake for 19-22 minutes, or until a toothpick inserted in the center comes out clean. Allow the cupcakes to cool for 5 minutes in the pan before transferring to a cooling rack to cool completely.
- While the cupcakes cool we can whip up the frosting! Transfer the butter and cream cheese to the bowl of a stand or handheld mixer and beat until combined and fluffy (about 2-3 minutes).
- Add the vanilla and salt and beat until combined. With the mixer on low speed, slowly add in 1/2 cup of powdered sugar at a time until all of it is added. Scrape down the bottom and sides of the bowl. Turn the mixer speed up to medium and continue to beat the frosting for another 1-2 minutes until super fluffy and creamy. Transfer the frosting to the refrigerator while working on the decorations.
- This is the time to have fun and get as creative as you’d like! Let’s start by coloring the fondant. I used the ivory mixed with a little brown for the deer, orange for the fox, and just a touch of ivory for the bunny (with a little pink for the inside of the ears). Roll each piece of fondant out and use the largest size circle cutter to create the hood. Then, use the next size down of the circles to cut out where the Cabbage Patch Kids Cuties faces will show through in the middle of your large circles. Repeat this with all of your different colors making one hood shape for each cupcake.
- Next, we will cut out the ears. Use the triangle cutters to cut out the ears for the deer and foxes (I used the chocolate fondant for the foxes). Then cut out a smaller triangle from the white fondant to add to the middle of each ear. I used a sharp kitchen knife to cut 2 oval shapes out of the ivory for the bunny’s ears (with 2 smaller ovals cut from the pink for the middles). You can also print the template and use the bunny ears as a guide for the shapes.
- Use the peach, pink, ivory and brown icing gel coloring to color 1 inch pieces of fondant to match the complexions of your Cabbage Patch Kids Cuties. This will be used for the noses. To form the noses, roll tiny balls of fondant for the middle of each nose and then smaller balls for each side. Use a little water to attach the pieces together. Allow them to dry.
- Time to frost the cupcakes and bring those Cuties to life! Separate the frosting into small bowls and color each to match the fondant noses you made. Transfer the frosting to the prepared piping bag and hold the bag straight above your cupcake. Squeeze until the frosting forms a mound fully covering the top of your cupcake. Repeat with each color until all cupcakes are frosted. Transfer the cupcakes to the refrigerator for 30 minutes. You can work on the chocolate pieces while you wait.
- The antlers, eyes, mouths, and eyebrows were all made out of melted colored chocolate. To make the process easier I’ve included a template that you can use as a guide by placing it under a sheet of wax paper. Transfer each color of chocolate or candy melts into a microwave safe bowl and microwave in 30-second intervals at 50% power until smooth (stirring between each interval).
- Use a toothpick dipped into the chocolate to “draw” your designs onto the wax paper (over top of the template) and allow the shapes to set.
- Once the cupcakes are fully chilled, use a butter knife, the back of a spoon, or an offset spatula dipped into hot water to smooth the top of the frosting (I like to keep a paper towel nearby to dab the spatula first so it doesn’t get water all over the cupcake).
- Add the fondant hood to each cupcake. Then add the noses to the center of the face with the mouth right below. The eyes go on either side of the nose and the brows right above each eye. Attach the ears and antlers under the fondant hoods using the frosting to help them stick (you can also add more melted chocolate if needed to act as edible “glue”).
- Use the food marker to color on a little piece of paper towel and dab onto each cupcake for the cheeks (or dust each with a little color dust). Admire your adorable work and enjoy!
Decorated cupcakes and any leftover frosting should be covered and refrigerated.
Please let me know if you try this tutorial, I would love to see your Cuties cupcakes! 🙂
join the mailing list!
get recipes and other delicious tidbits sent to your inbox!