Apple Cinnamon Deep Dish Slab Pie
*This post was created in collaboration with Arctic Zone . All images and opinions are my own.
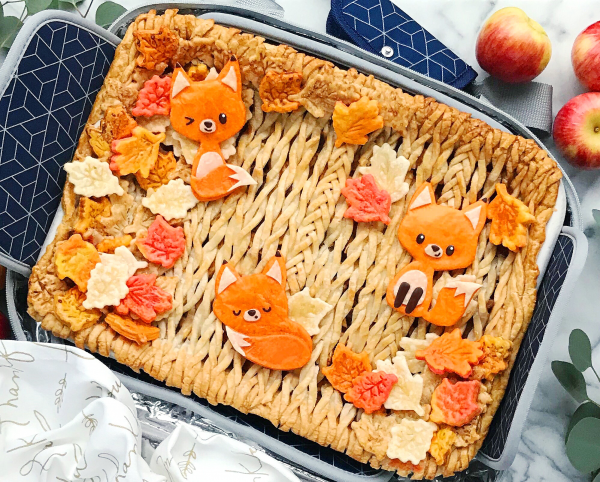
What would Thanksgiving be without pie?! Every year I bake at least 2 different varities to bring to my family’s celebration – always a pumpkin, and then I like to do a twist on an apple (especially for the kids). As our family continues to expand, 2 pies just barely seems to be enough anymore, so this year I decided to make the monster of all pies in collaboration with my friends at Arctic Zone. This Apple Cinnamon Deep Dish Slab pie is perfect for a hungry holiday crowd! The slab sizing takes the place of about 2-3 regular sized pies to save both time and a little much needed sanity :). While they are usually baked in a jelly roll pan, I decided to use a dish that you probably already have in your kitchen to make this slab pie deep dish, and easier to transport to all of your holiday gatherings (and because who has room for more pans anyway?!). The 9X13 in pan also fits perfectly into a thermal tote like the Arctic Zone Food Pro Thermal Carrier that I’m using to carry this hefty pie to my dad’s here shortly. Besides being gorgeous, I love that this Arctic Zone carrier is safe – BPA, PVC, lead, and phthalate free, easy to wipe clean, and uses thermal-flect radiant heat barrier to keep food hot for up to 6 hours!
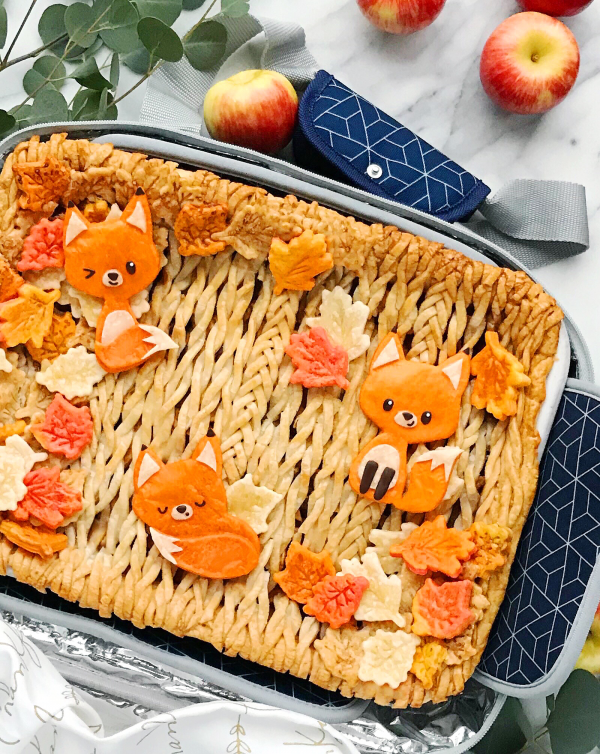
To match the warm, comforting apple cinnamon and toasted pecan flavors of the filling I decided to go with a cute and cozy decoration for the top. While I love a good braided pie who has time for that haha, so I faked it by using pie dough twists instead with just a handful of chunky fishtail braids mixed in to give a cable knit sweater look. You know I can’t make food, especially festive food, without a cute character, so I completed the look with a few playful foxes. Pie decorations can look intimidating, but I promise this is easy as well, pie :). Using pre made crust along with the template below will speed up the process and take out any guess work. I created braids every 7 twists, but feel free to arrange the top in any order you would like, or even to skip the braids entirely. No matter how you decorate your pie it’s sure to be a hit with all your loved ones!
Ingredients: (Serves 18-20)
Pie:
3 packages refrigerated piecrust, softened as directed on box
7-8 lbs. tart apples, peeled, cored, and sliced ¼ in thick (I used Honey crisp)
Juice of half a lemon
9 tablespoons all purpose flour
1 cup packed brown sugar
1 tablespoon ground cinnamon
½ teaspoon ground nutmeg
¼ teaspoon ground cloves
½ teaspoon salt
1 cup pecans *optional
2 ½ tablespoons unsalted butter
9 X 13 in. baking dish (I recommend stoneware as it can be baked at a high temp.
Decorations:
Red, orange, and yellow gel food coloring
Leaf shaped pie or cookie stamps
Heavy Kraft cardstock
1/8 cup milk or dark chocolate chips (or compound chocolate)
1/8 teaspoon coconut oil
Egg wash:
1 egg, beaten
Granulated or Turbinado sugar for sprinkling
Helpful Tips
The piecrust decorations can be made and chilled the day before baking. Brush the bottom crust with egg wash before adding filling to prevent it from getting soggy. It’s always easiest to work with chilled piecrust, so feel free to pop the dough back into the refrigerator/freezer, as needed, while working on the designs.
*All cutting should be done by an adult.
Directions:
- To begin, let’s toast the pecans to really bring out the flavor! Preheat the oven to 325°F Line a baking sheet with parchment paper, and spread the pecans out into a single layer. Bake for 8-10 minutes, or until fragrant. Set aside to cool.
- Remove 2 piecrusts from the refrigerator; unroll them onto a sheet of parchment paper and stack, one on top of the other. Place another piece of parchment paper on top (this prevents you from needing extra flour), and roll the dough into a 12 X 16 inch rectangle. Fit the crust into your baking dish, pressing into the corners. Fold any extra dough under, even with the edges of the dish. Transfer to the refrigerator while working on the decorations.
- Roll a new piece of piecrust out into a 12-inch circle, and use a ruler and pastry wheel to cut it into ¼ inch strips.
- To create a cable knit look we will be using these strips to make both twists and braids (just like how an actual sweater has a mix of patterns).
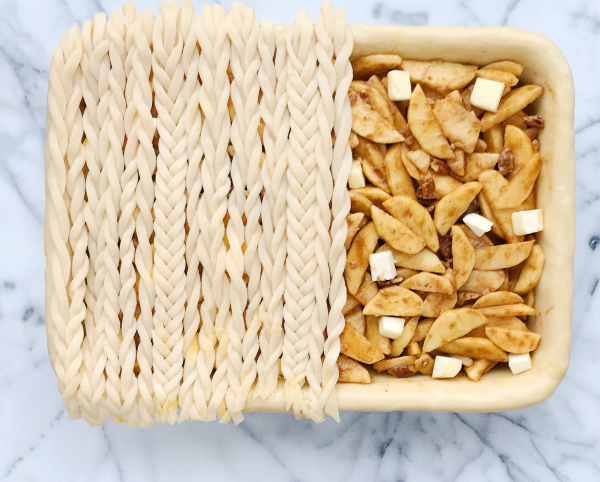
- To make the twists, use a little egg wash to join 2 strips together at the top. Start with either strand using it to overlap the other one, while pressing the design flat as you go (see tutorial image for guidance). Repeat this process with the next set of strips, but start with the opposite strand to twist around the other. When you lay the 2 twists next to each other they form a knitted look.
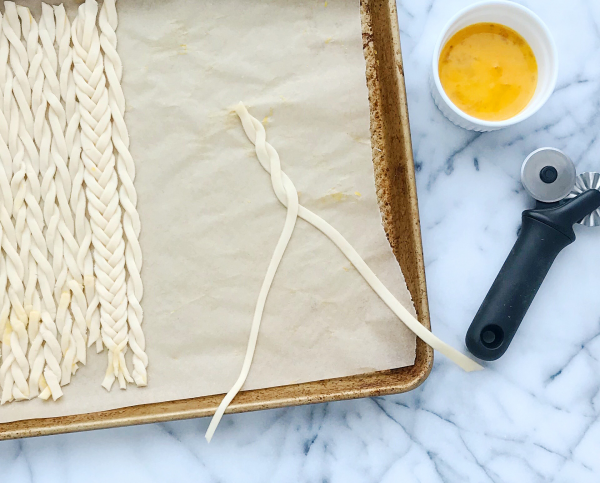
- Repeat this as many times as you would like before creating the braids. I find it easiest to lay the finished twists (and braids) onto a parchment lined baking sheet. This allows you to see the design as it’ll look on top of the pie, and you can also measure how big to make it to cover your baking dish (plus, it’s easy to move in and out of the freezer).
- To create the fishtail braids, gather 5 strips of piecrust, pressing them together at the top. Separate the strands so that there are 3 on 1 side, and 2 on the other. Take the outer strand (on the side w 3), and bring it next to the side with 2. Repeat this until you reach the end (see tutorial image for guidance). I created a braid every 7 twists, but you can make any pattern that you would like.
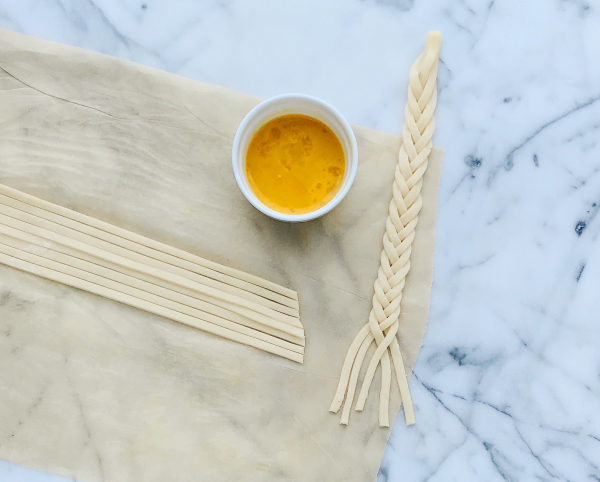
- Once all the twists and braids are completed transfer the baking sheet to your freezer while making the pie filling.
- Place all of the pie ingredients into a large mixing bowl, and toss to combine. If you are using an apple that is very tart feel free to increase the sugar by 1-2 tablespoons.
- Transfer the filling to your prepared baking dish, and dot with the butter.
- Use a pastry brush (or clean paper towel) to brush egg wash all along the edges of the piecrust. Carefully transfer your knitted pieces to the top securing to the edges. Trim any pieces that hang over the side of the baking dish.
- Roll out a new piece of piecrust, and use cookie stamps to press as many leaf designs out as possible. You can also create a few marbled leaves by coloring 3 sections of the pie dough orange, yellow, and red. Twist the 3 sections together (reserving some of the orange for the foxes), and knead slightly to mix. Roll the colors out and cutout your leaves.
- Transfer the leaves around the top of the pie using egg wash to secure them, and then place the pie in the refrigerator for 30 min.
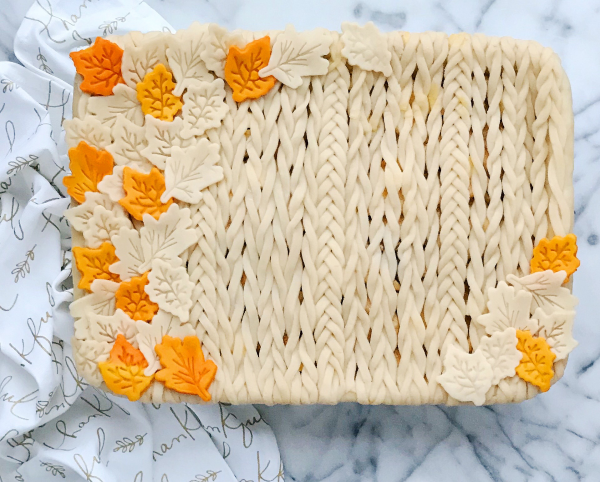
- Preheat the oven to 400°F, and move the oven rack to the lowest setting. Once the pie has finished chilling, brush it with egg wash, sprinkle on sugar, and transfer it to the oven to bake for 20 minutes. Decrease the temp to 375°F and bake for 40-60 minutes longer or until the top crust is golden and the filling is bubbling (using foil to cover the edges if they begin to brown too quickly).
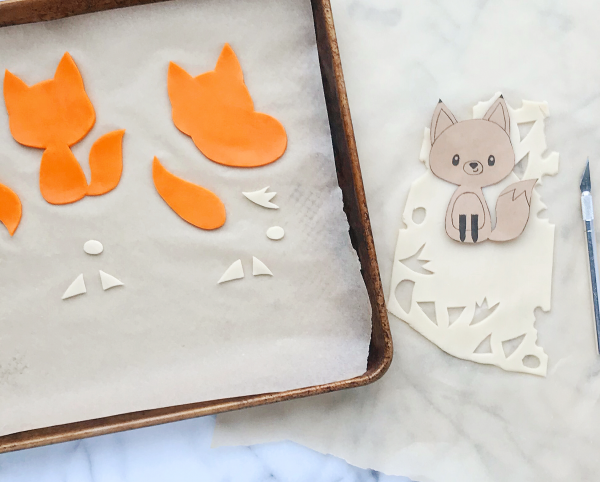
- Print the fox templates onto cardstock paper (adjust the sizes as you would like them to be on the pie).
- Roll out the rest of your orange dough, and use either an X-acto or sharp kitchen knife to cut the fox shapes out. Use any scraps of regular dough to create the belly, ear, and tail details. Brush a little egg wash onto the pieces to combine them, and transfer to a parchment lined baking sheet.
- Use your leaf cutters to cut out as many shapes as possible from the leftover dough. These can be used to cover up any gaps once the pie bakes (and will also add even more color). You can gather any extra dough and roll it out again as needed. Transfer the cutouts to the freezer for 15 minutes.
- Preheat the oven to 350° Once the cutouts are ready, bake them for 8-10 minutes and then set aside to cool while working on the chocolate details.
- Place the chocolate chips or compound chocolate into a microwave safe bowl (you can add the coconut oil if you are using chocolate chips to make them smoother), and heat in 30-second intervals at 50% power, stirring between each, until smooth and melted.
- Place the template under a sheet of wax paper, and use a toothpick dipped into the chocolate to draw the legs and faces. Allow to set. (You can also draw the designs directly onto the piecrust cutouts once they have cooled).
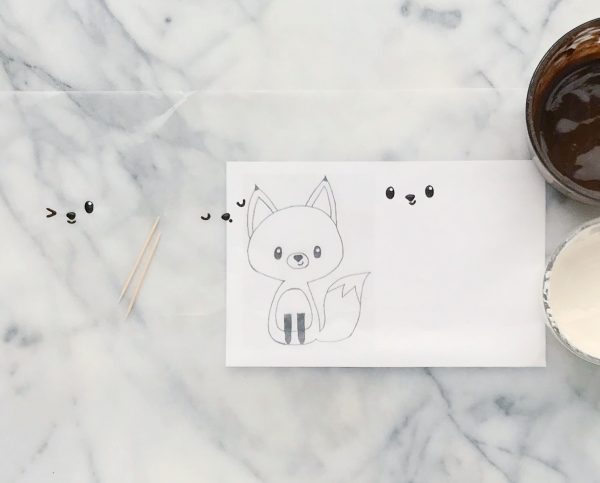
- Once the fox cutouts have cooled (wait at least 15 minutes) you can transfer the chocolate details, and use even more chocolate to add to the top of each ear.
- Arrange the extra leaf cutouts and foxes around your pie, sprinkle with more toasted pecans and enjoy! To transfer to your Arctic Zone Thermal Carrier (which is how I’m carrying mine to my family’s Thanksgiving dinner) place your baking dish on the trivet, cover with foil, and carefully place inside of the carrier (holding the sides of the trivet).
The baked and cooled pie can be loosely covered with foil and kept at room temperature for up to 2 days, or stored in the refrigerator to keep for longer. You can find this Arctic Zone Food Pro Thermal Carrier in other colors and designs at Arctic Zone.
join the mailing list!
get recipes and other delicious tidbits sent to your inbox!