Collagen Ube Ice Cream

*This post was created in collaboration with Great Lakes Gelatin. The recipe, images, and opinions are all my own.
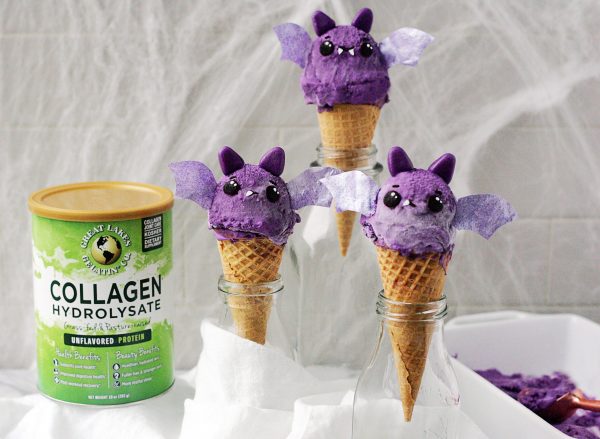
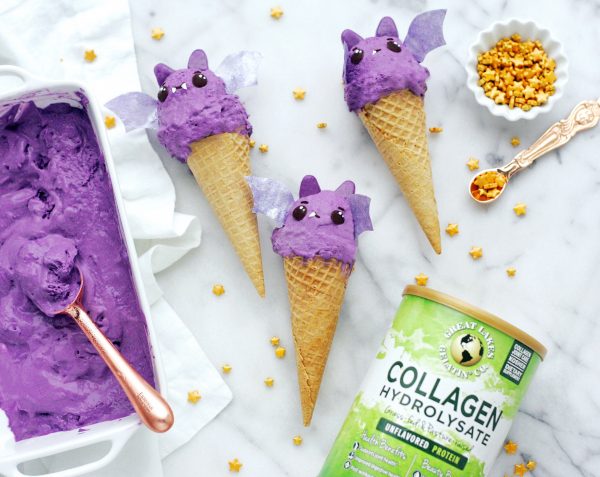
It’s the most fangtastic time of the year, and while I love all the festive sweets, I thought it might be nice to throw in a slightly healthier treat (plus, it’s ice cream, and who doesn’t love that?! ).
The spooktacular shade of purple comes from ube extract. I used ube to make cream puffs last Halloween and I’ve been wanting to bring it back ever since. I think it has a deliciously sweet and slightly vanilla flavor, so I really amplified that here by adding vanilla extract. It would also be yummy with a dash of cinnamon, and if you want to go all out for the holiday feel free to top it off with some candy :).
If you’ve never made dairy free ice cream before I will let you in on a secret- it’s SO MUCH EASIER than the regular stuff! No raw eggs or ice baths. You just heat, blend, chill and churn. I’ve been making dairy free ice cream for awhile now, always tweaking the recipe to try to make it even creamier, and I’ve found that 1/2 cup of cashews does the trick. Collagen is also a great way to add a bit of natural creaminess to a recipe, plus it adds a wonderful boost of good for you amino acids, so I thought it would be perfect here. I take collagen every morning in either my smoothie or coffee because it’s a clean source of protein (without any of the bloat some other protein powders can cause), it supports digestive health (even helping to heal a leaky gut), and it’s great for hair, skin and nails. The GLG Collagen is unflavored, and it works in both hot and cold foods, so the sky is the limit to how you use it!
If you’d like to try Great Lakes Collagen or Gelatin you can use my code luxeandthelady20OFF for 20% off of your first purchase (US citizens only, excludes 12 packs). Please let me know if you try this recipe! I always like to see your spin on my creations.

Ingredients: (makes about 1.5 quarts)
Ice Cream:
1/2 cup raw cashews, soaked (see below for instructions on soaking)
1 14oz can full fat coconut milk
1 14oz can coconut cream (I like Trader Joe’s brand, or else you will have to refrigerate the can upside down the night before)
2 scoops Great Lakes Gelatin Collagen Hydrolysate
2 teaspoons ube extract
1/4 teaspoon sea salt
2 teaspoons pure vanilla extract
9 drops pure liquid Stevia extract (or 2-4 tablespoon pure maple syrup depending on how much sweetness you like)
Bat Decorations:
1/4 cup vegan or regular white chocolate chips
1/4 cup dark chocolate chips
1/4 teaspoon coconut oil (divided between the types of chocolate)* (optional to smooth the chocolate)
Marzipan
Ube extract
1 sheet wafer paper
Purple color or shimmer dust
Food safe paintbrush
Vanilla extract
Sugar cones
Directions:
- The chocolate details can be created in advance by melting the chocolate chips and coconut oil (if using) over a double boiler, or in the microwave (in 30 second bursts) until smooth. Use a toothpick dipped in the melted chocolate to draw the fangtastic smiles and eye onto a piece of wax paper. Allow them to set while you make the ice cream. Placing them in the refrigerator helps to speed up the process. You can also color a little marzipan with the ube extract and form it into triangles for the ears. To make the wings I added the color dust to a bit of vanilla extract and painted it onto wafer paper. Once the paper was dry I cut the wings out.
- To soak the cashews, add 1/4 tablespoon sea salt to a bowl with 1 cup water and add the cashews. Cover them and allow them to sit on the counter for at least 3 hours. Drain and rinse until the water coming off of them is clear. Set aside until ready to use.
- To make the ice cream base, add the coconut milk and coconut cream (just the cream on top, not the liquid) to a small saucepan and bring to a simmer.
- Transfer the base to a high powered blender and blend with the collagen, salt, soaked cashews, vanilla, ube, and sweetener of your choice for at least one minute on high (be careful to watch the lid as you are using a hot liquid).
- Move the ice cream mixture to a heat proof bowl, cover snugly with plastic wrap (I like to place the wrap so it touches the top of the mixture to prevent a “skin” from forming), and place in the refrigerator for at least 4 hours or overnight to cool. If you aren’t going to churn the ice cream you can now transfer it to a heat and freezer safe container (a small casserole dish or baking pan works well). Transfer right into your freezer. You will want to stir the mixture every so often for the first few hours so no ice crystals form.
- When you are ready to make your ice cream, transfer it to an ice cream machine and churn following the manufacturer’s instructions (keep in mind that non dairy ice cream freezes in almost half the time of a recipe with dairy).
- Eat immediately for a soft serve like texture, or place in a freezer safe container, and freeze for at least 2 hours to set into ice cream.
- To make your scoops a it batty, add the chocolate details, marzipan ears, wafer wings, and enjoy! You could also use Oreo cookies broken in half for the wings if you prefer.
Leave a Reply
join the mailing list!
get recipes and other delicious tidbits sent to your inbox!
[…] it to my daily cup of coffee (or smoothie in the warmer months), and even created an ube ice cream recipe with […]